
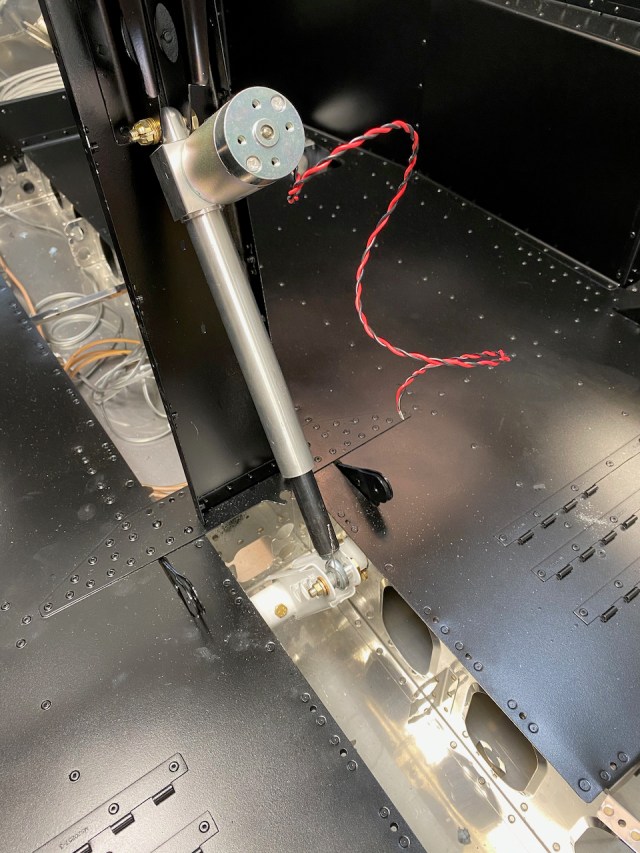
This was a relatively quick section which entailed installing the Flap Actuation system including the torque arms, motor, and the Flap Position Sensor. The torque tube is position directly underneath the seats.
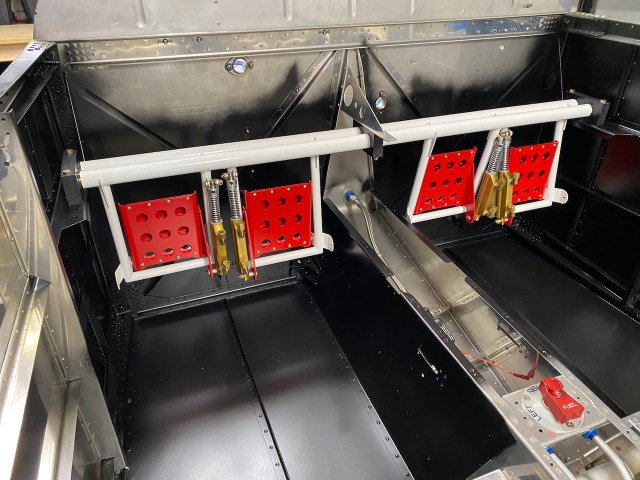
The hours spent on this included the painting I showed in Section 32. I started this section by having the rudder pedal parts powder coated red. I think it will look pretty cool with the white rudder bars and the black floor and side panels. You might notice some paint spray on the firewall. I […]
It has been a while since I posted an update. Many things got in the way of completing this including a vacation, a weekend away for an EAA Electrical Class, and the big winter freeze of 2021. This section also took a while simply because some of the rivets required me to climb into the […]
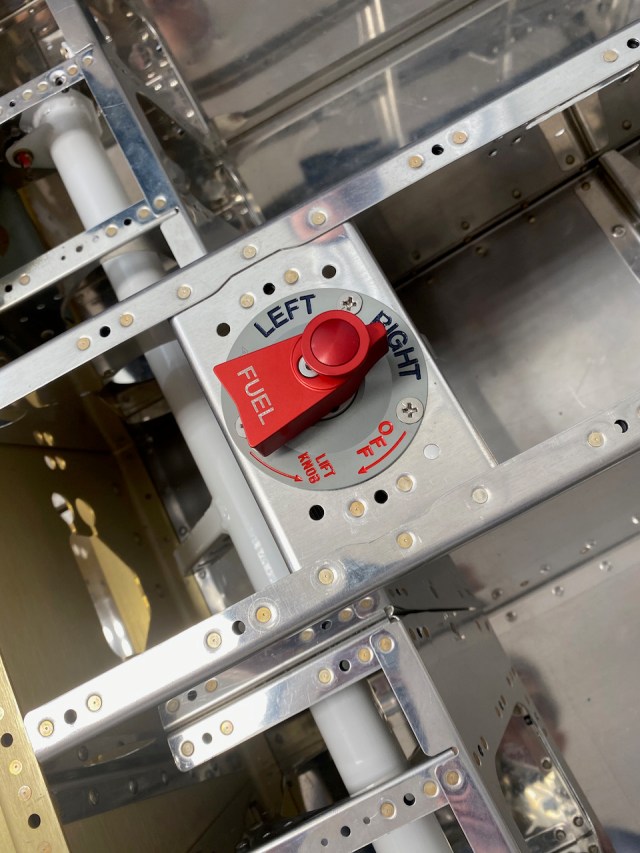
Here we are installing the fairly vital and important fuel lines inside the fuselage. I opted to buy the fuel tubing lines pre-bent and flared from Aircraft Specialty. I think it was money well spent because the lines aligned perfectly and saved several hours of fabricating the tubing myself. Also installed here was the fuel […]
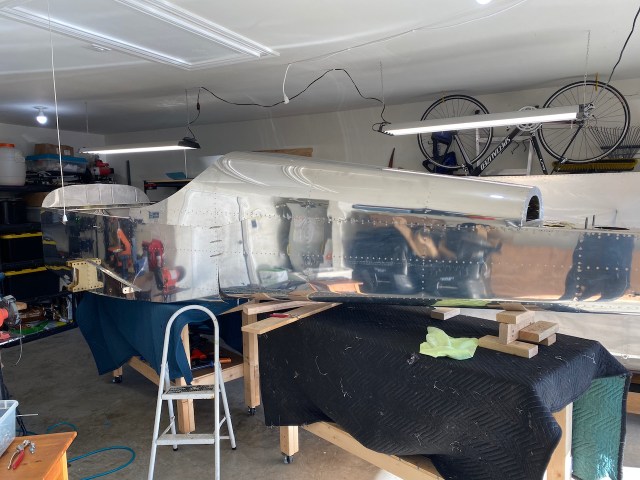
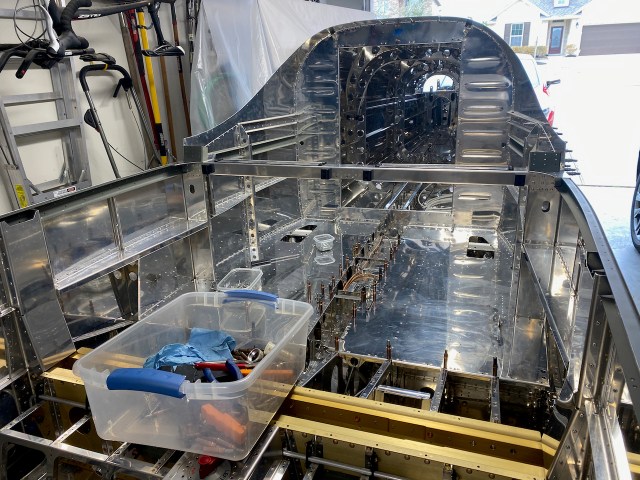
This one takes the cake for the most fun and most “it looks like an airplane is being built” step so far. Basically, the section consisted of attaching the rear empennage, built well over a year ago, to the forward section of the fuselage just completed. I had a pilot buddy help with this because […]
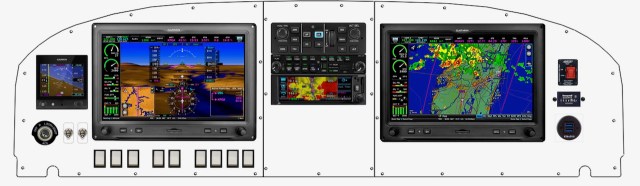
I have been a lot of thinking about my panel. Without going into too much detail, here it is for now. It will be all Garmin and employ two 10″ G3X panels, 2 remote comms, autopilot, GNX 375 IFR Navigator (with transponder), a G5 backup attitude indicator, and an audio panel.
Wow! This was a big one. Lots of detailed work and lots and lots of rivets. This section mostly consisted of attaching the two side skins to the forward fuselage section. At the conclusion of this section, I believe I am over 80% complete with the riveting, and no more big skins to dimple. This […]
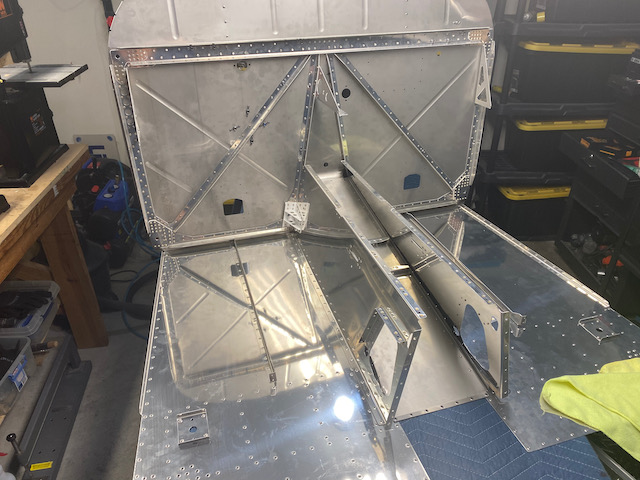
This section mainly concerned itself with the floor of the fuselage near the firewall. It first consisted of dimpling skins (of course). Some skin stiffeners were also added by back riveting. Stainless steel sections were put in between the two bottom skins. These immediately surround the muffler and exhaust which exits the rear of the […]
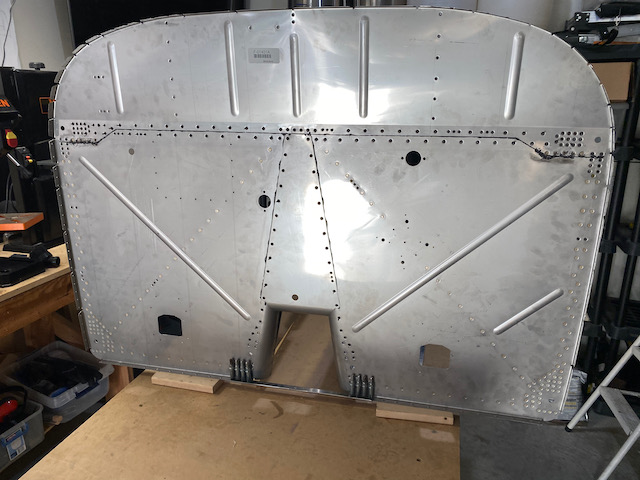
Leaving all those ribs behind, it was time to tackle the firewall. The firewall is the barrier between the cockpit and the engine. Thus, it basically needs to be sealed off from whatever messy stuff the engine emits like oil and exhaust. Yes, this means the return of proseal. There were not many parts in […]
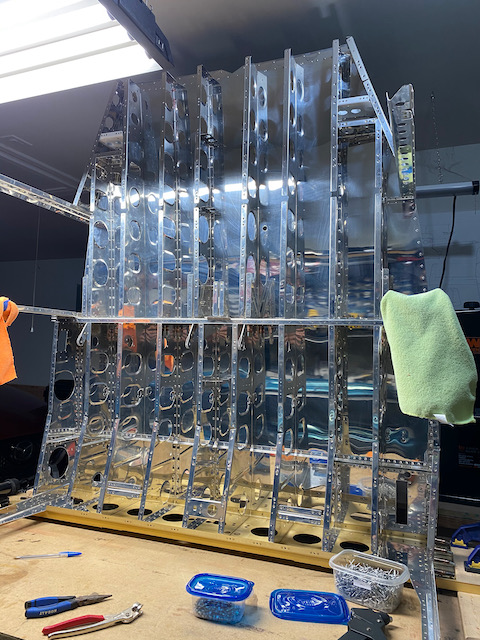
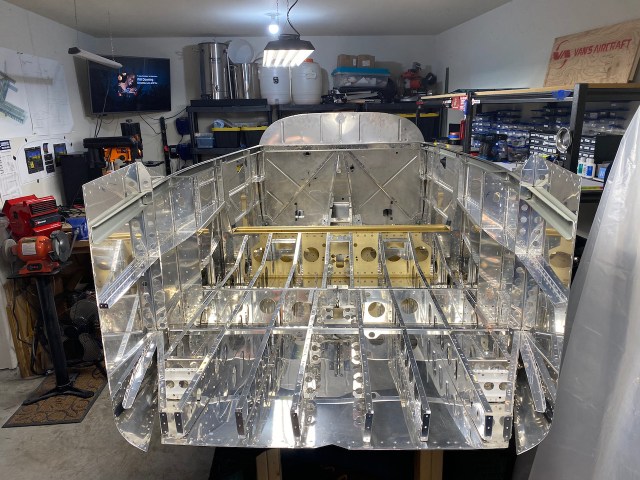
This section certainly took a while. As you can see in the diagram above, it contains a tremendous number of ribs which eventually turn out to be the floor of the fuselage. Basically, the seats in the airplane sit just above these ribs. As with any time I work with ribs, the deburring skills get […]
