
I mentioned in the previous post that I was unsatisfied with how the hinge attaches the upper cowling to the firewall, and that I will Skybolts instead. The Skybolts arrived and I installed them over the last week.
Skybolt is a company that makes a variety of 1/4 turn camlocks used by aviation and even auto racing. They have a kit specific for Vans Aircraft which is an option that a large percentage of builders choose to use.
The Skybolt installation is covered in the next several photos:
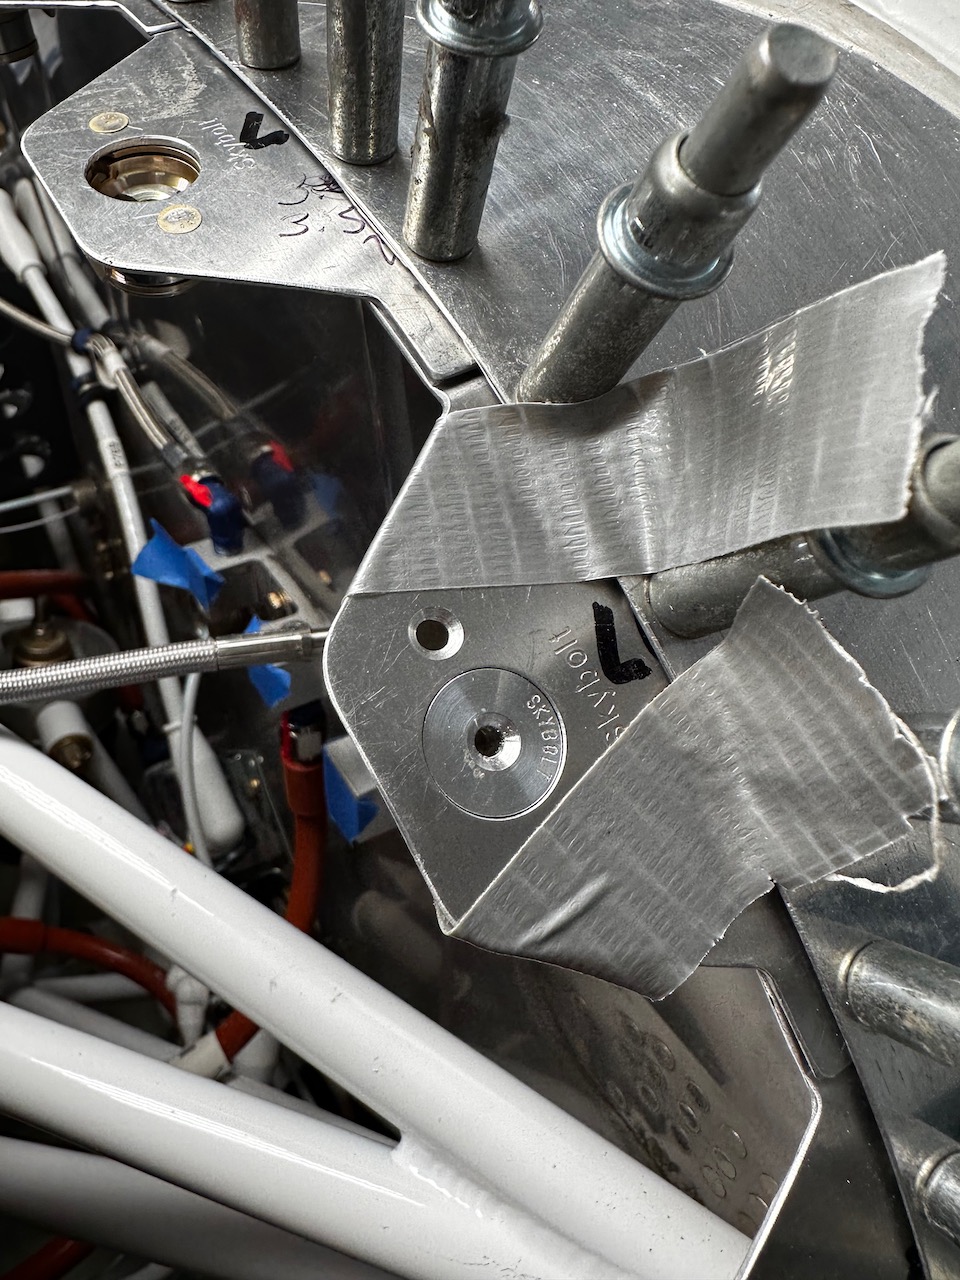
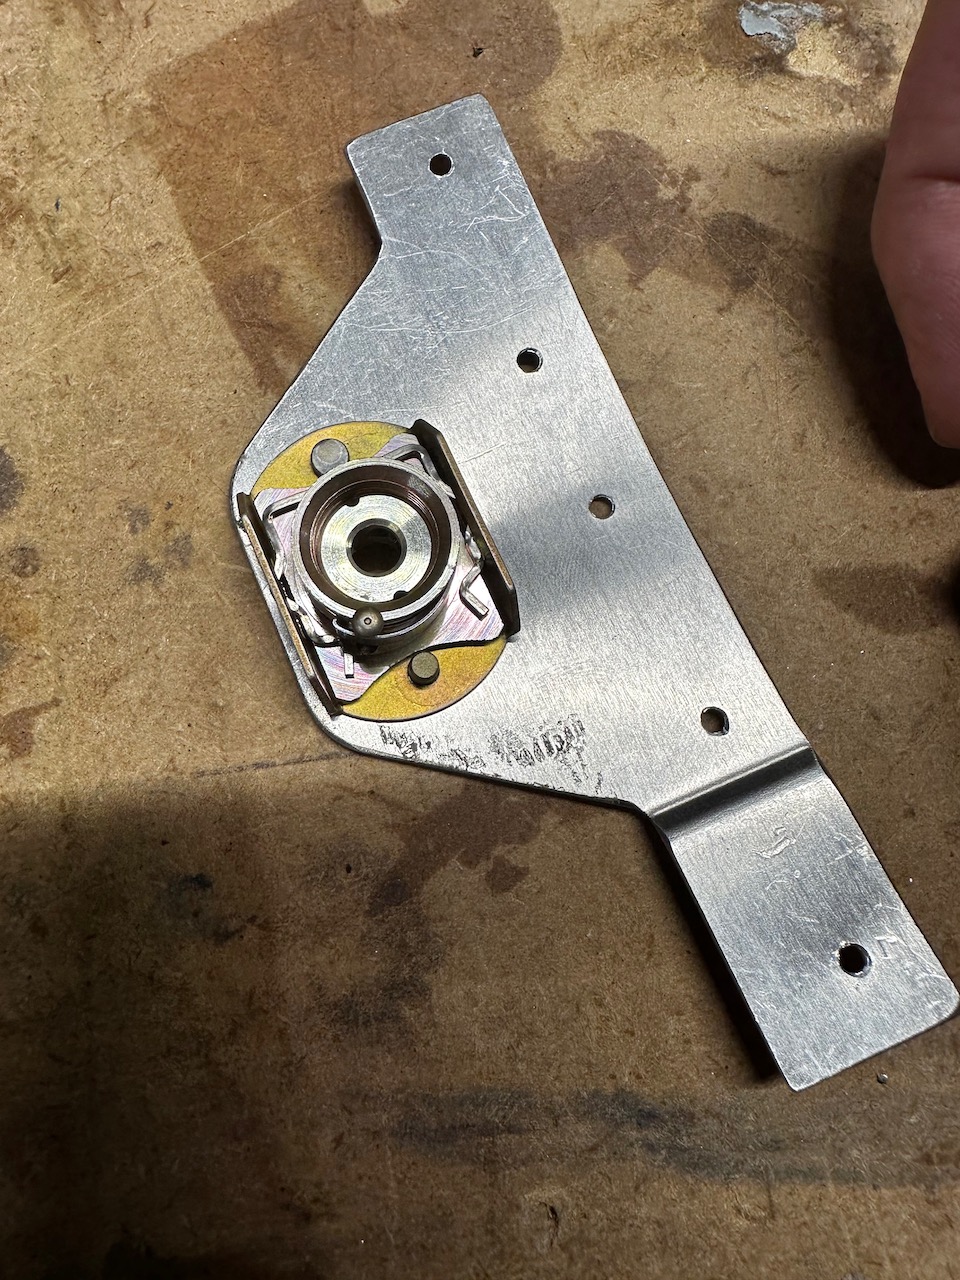
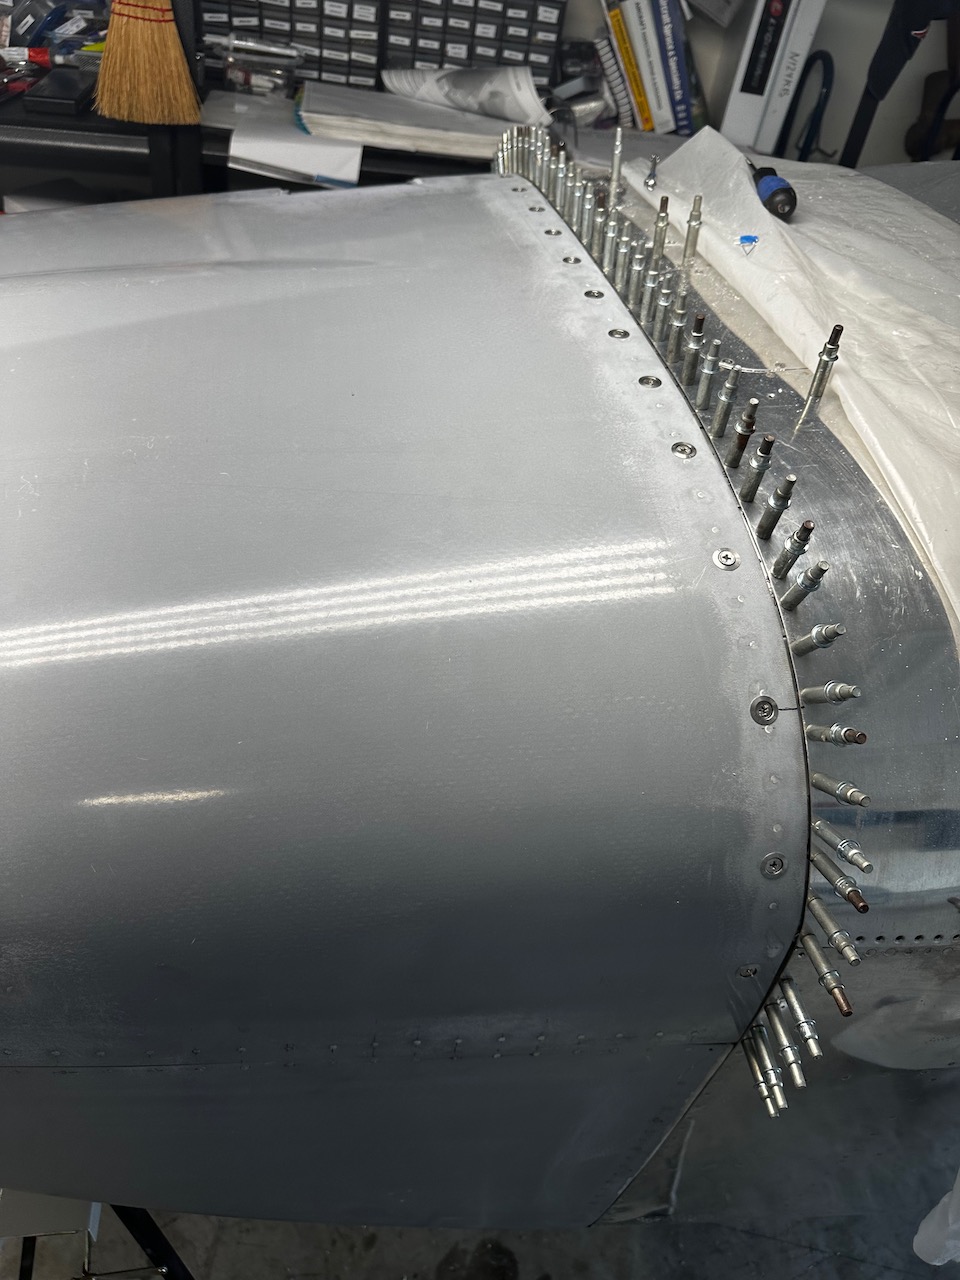
Flanges that hold the Skybolt receptacles are cleco’d and eventually riveted to the firewall. In my case, I used 17 around the perimeter of the firewall I had to space them out in order to not cause interference with the engine mount. The top 7 were spaced 2 3/4″ apart, a couple were 3″ apart, and the remainder were 3.5″ apart.

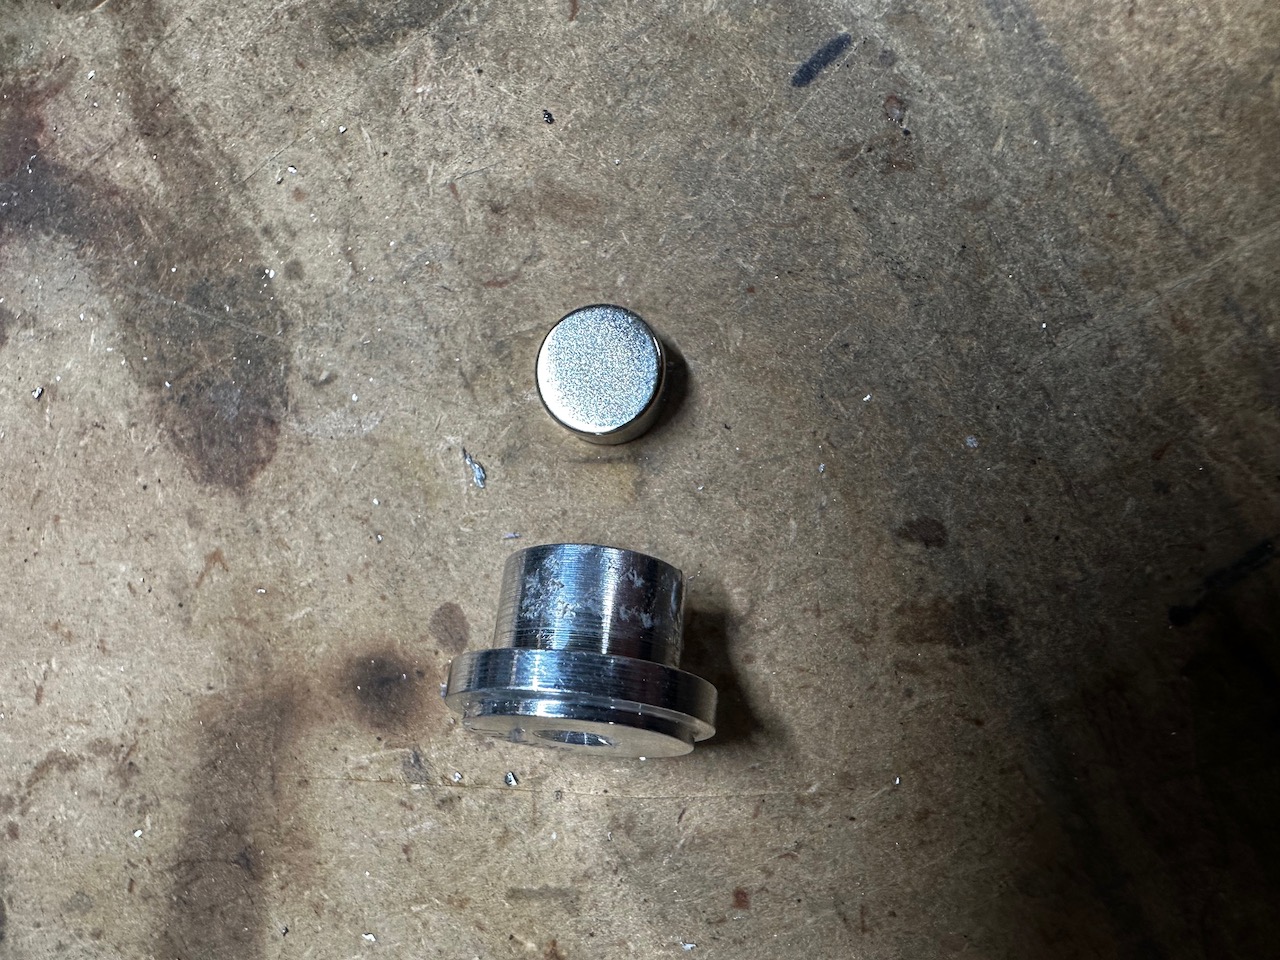
In the steps that follow, I needed to drill into the fiberglass cowling where the Skybolts needed to be installed. The trick for alignment was to use magnets. What is shown below is an adapter and a very powerful barrel magnet. This is taped to the flange….
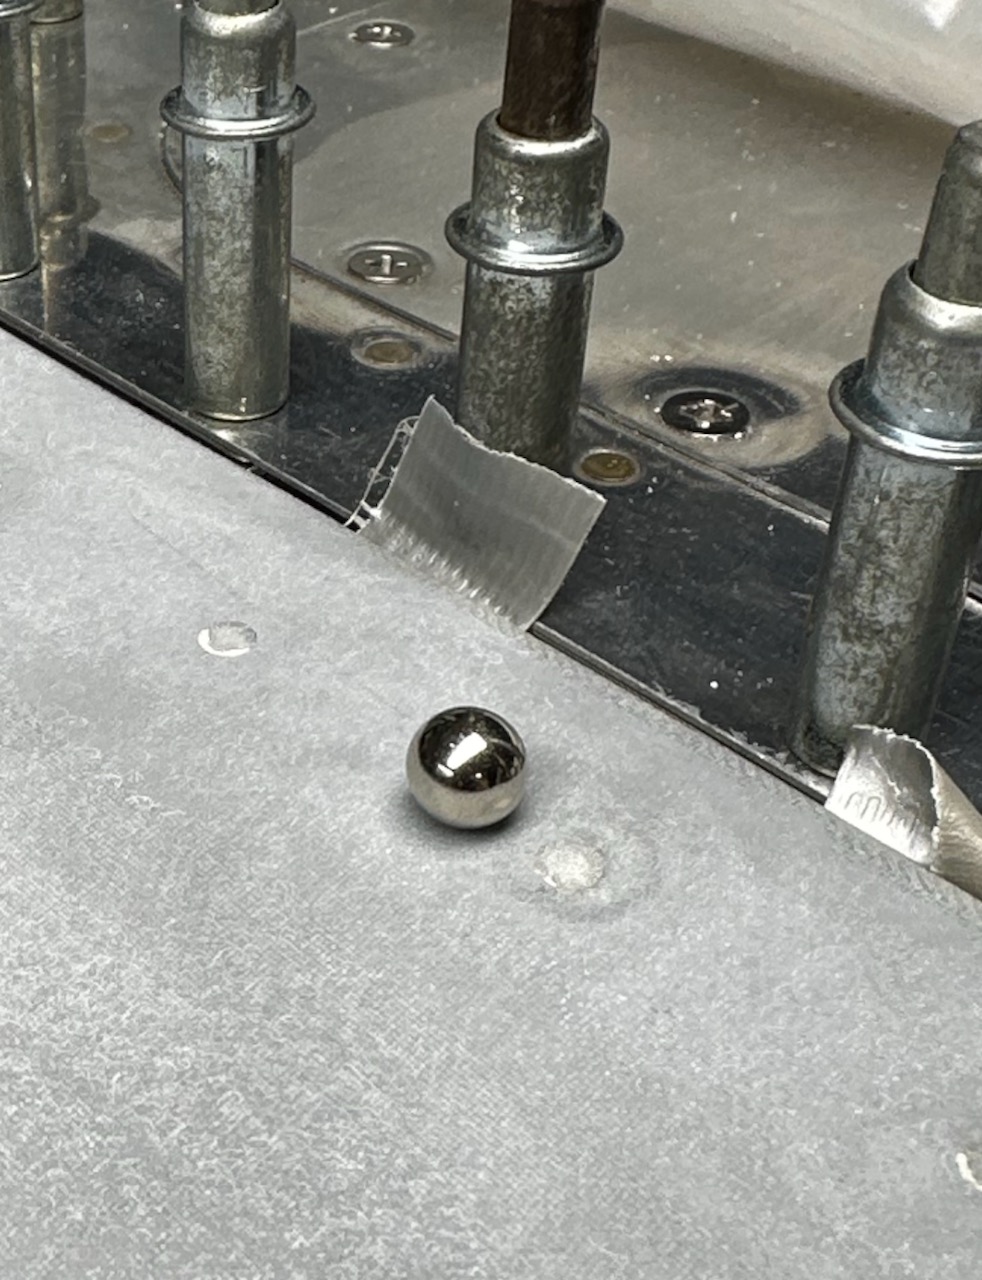
…and then the cowling is placed on the airplane, and a ball magnet is dropped into the general area. The magnets are so strong, the ball had no issues finding where it was supposed to be. By the way, you can see in the following photos where I filled in with epoxy and flox where the holes used to be holding the hinges.
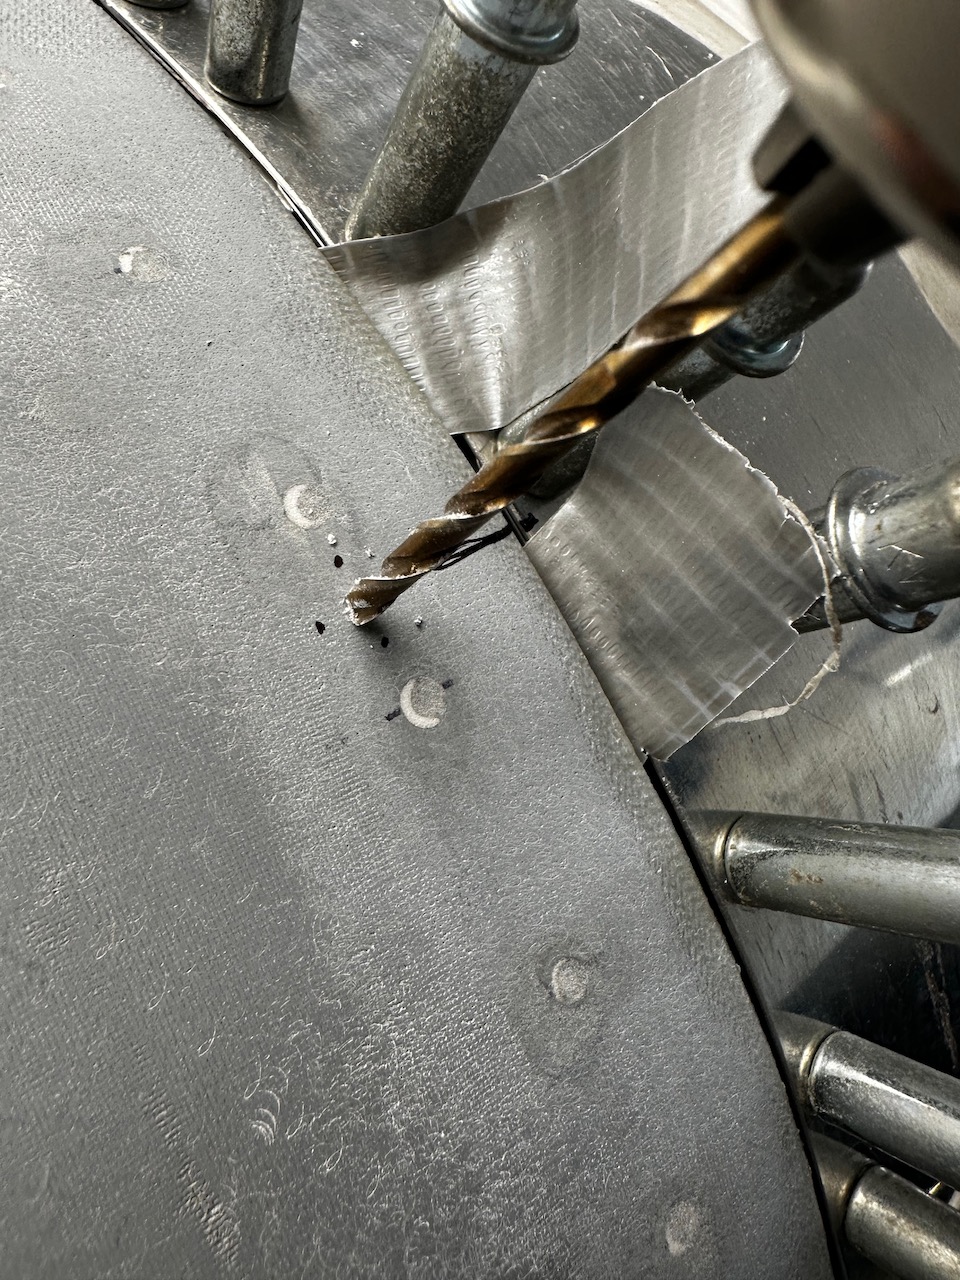
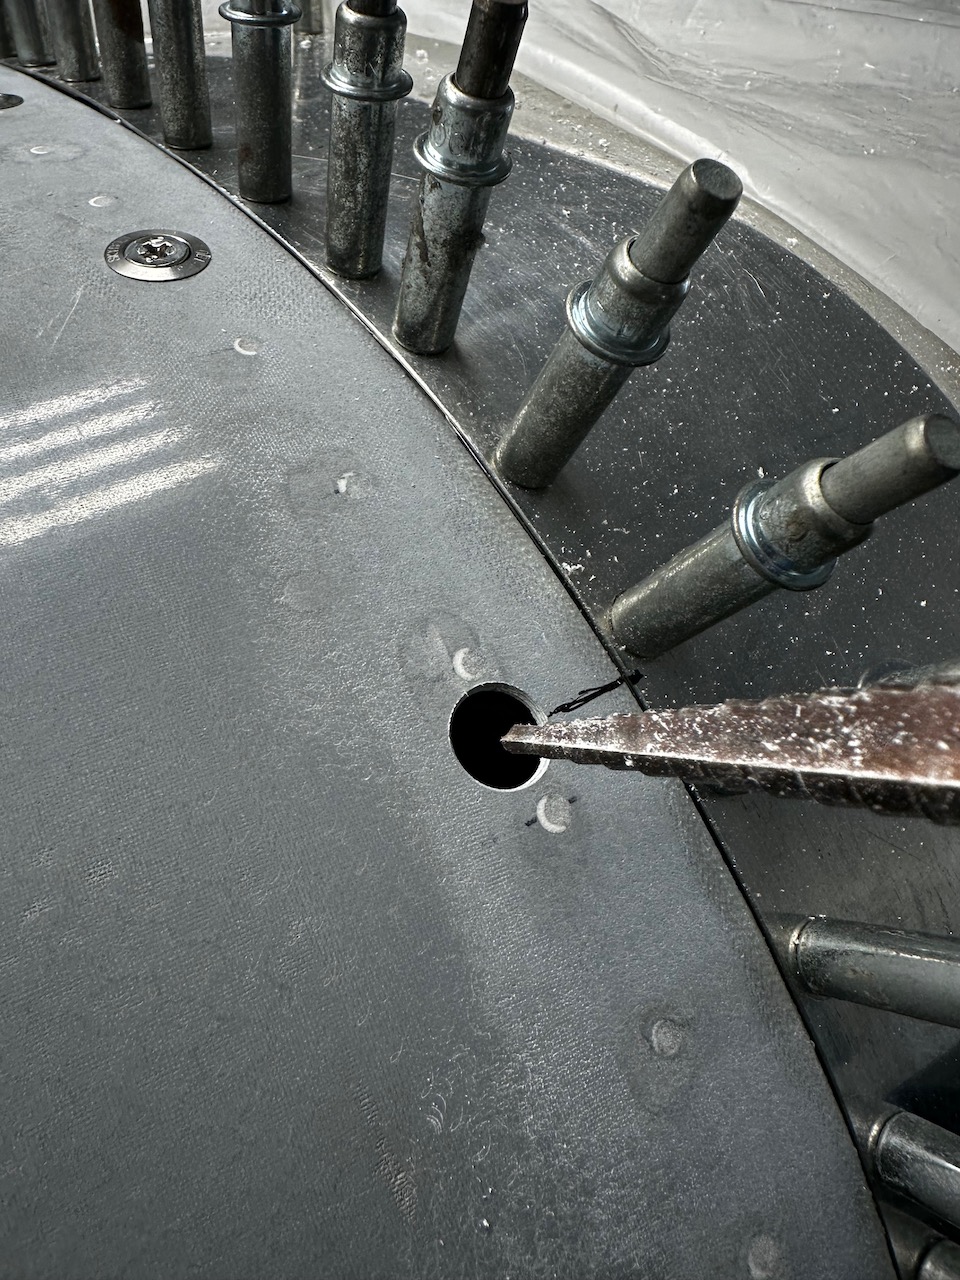
The ball location was marked and then a #30 drill was started followed by a step drill to 15/32″.

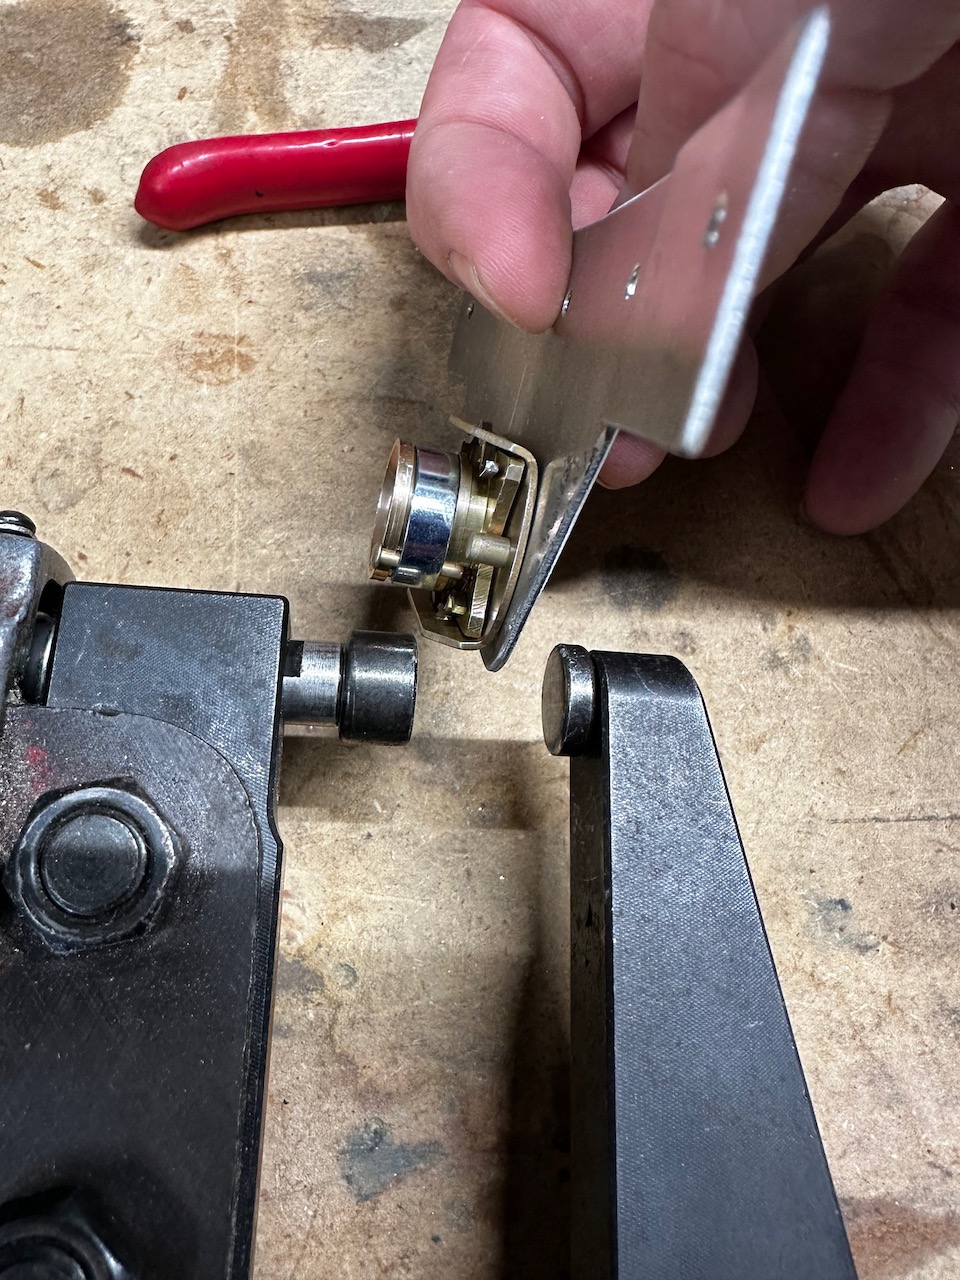
The receptacle was then riveted to the flange. I chose to remove the flanges to do the riveting.
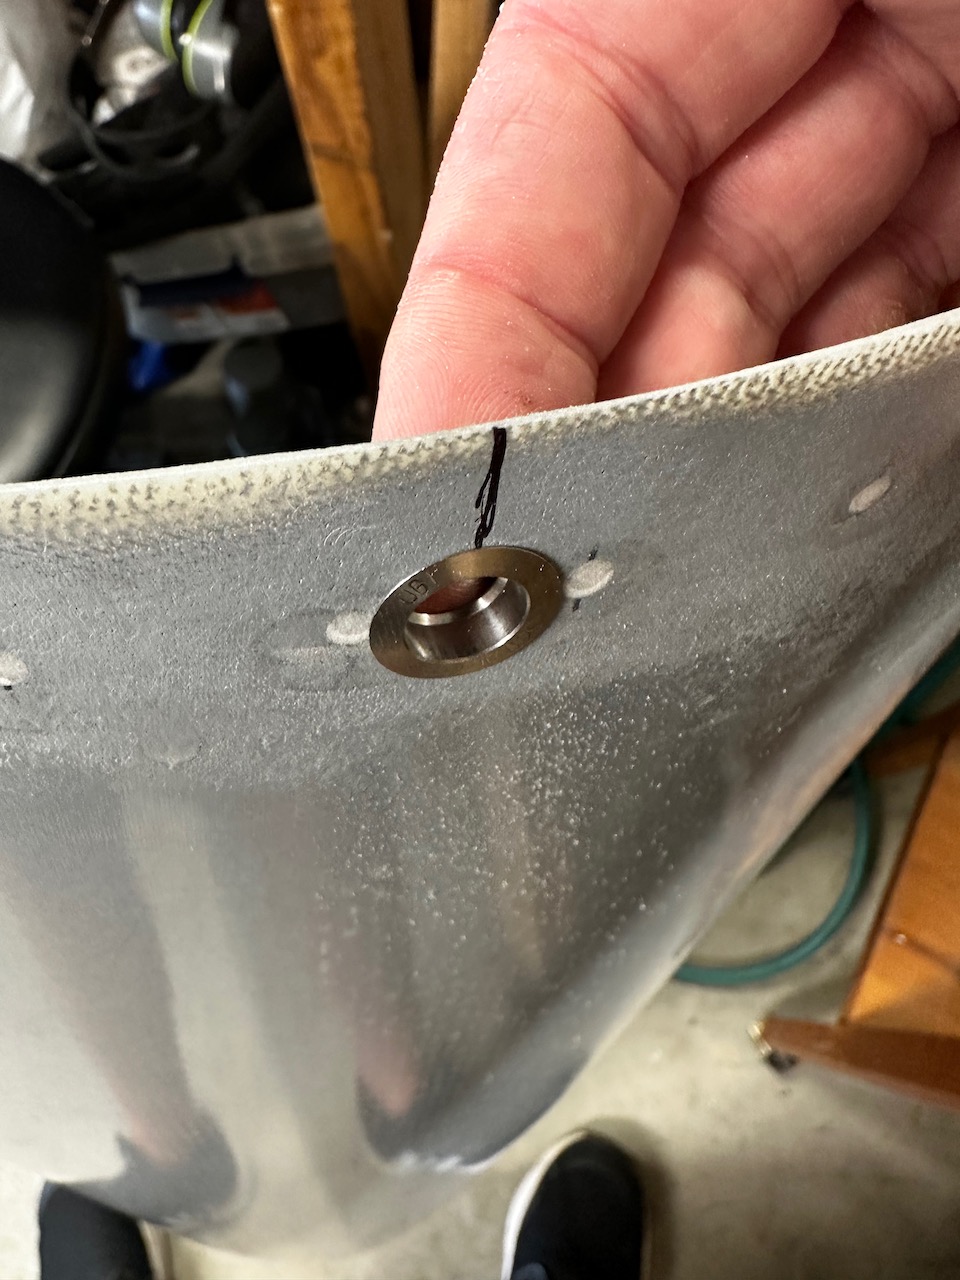
A grommet was placed in the hole in the cowling and held in place with an oring. After painting, the oring will be replaced by a steel retainer for permanent installation.

Special Skybolt pliers are then used to install the camloc stud into the grommet.

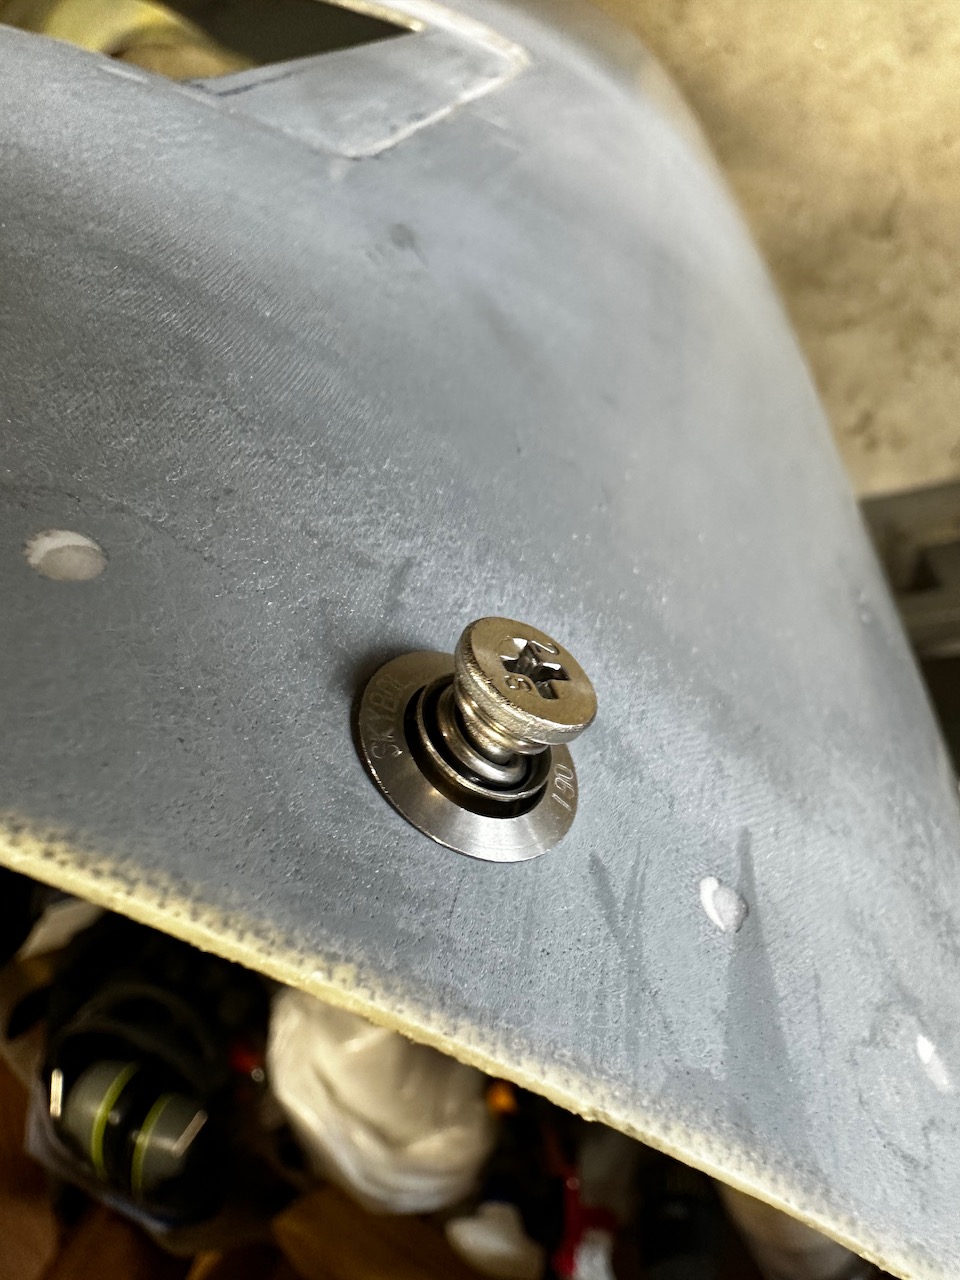
A quick and easy turn of the stud locks the whole thing in place. I don’t show it here but turning the stud beyond the locking will adjust it up or down until it is flush. After that, a retaining pin is removed from the receptacle, and the receptacles is locked in place.

After a few nights work, all 17 Skybolts are installed. Now, no more scraping and burning my arms working with the hinge pins.
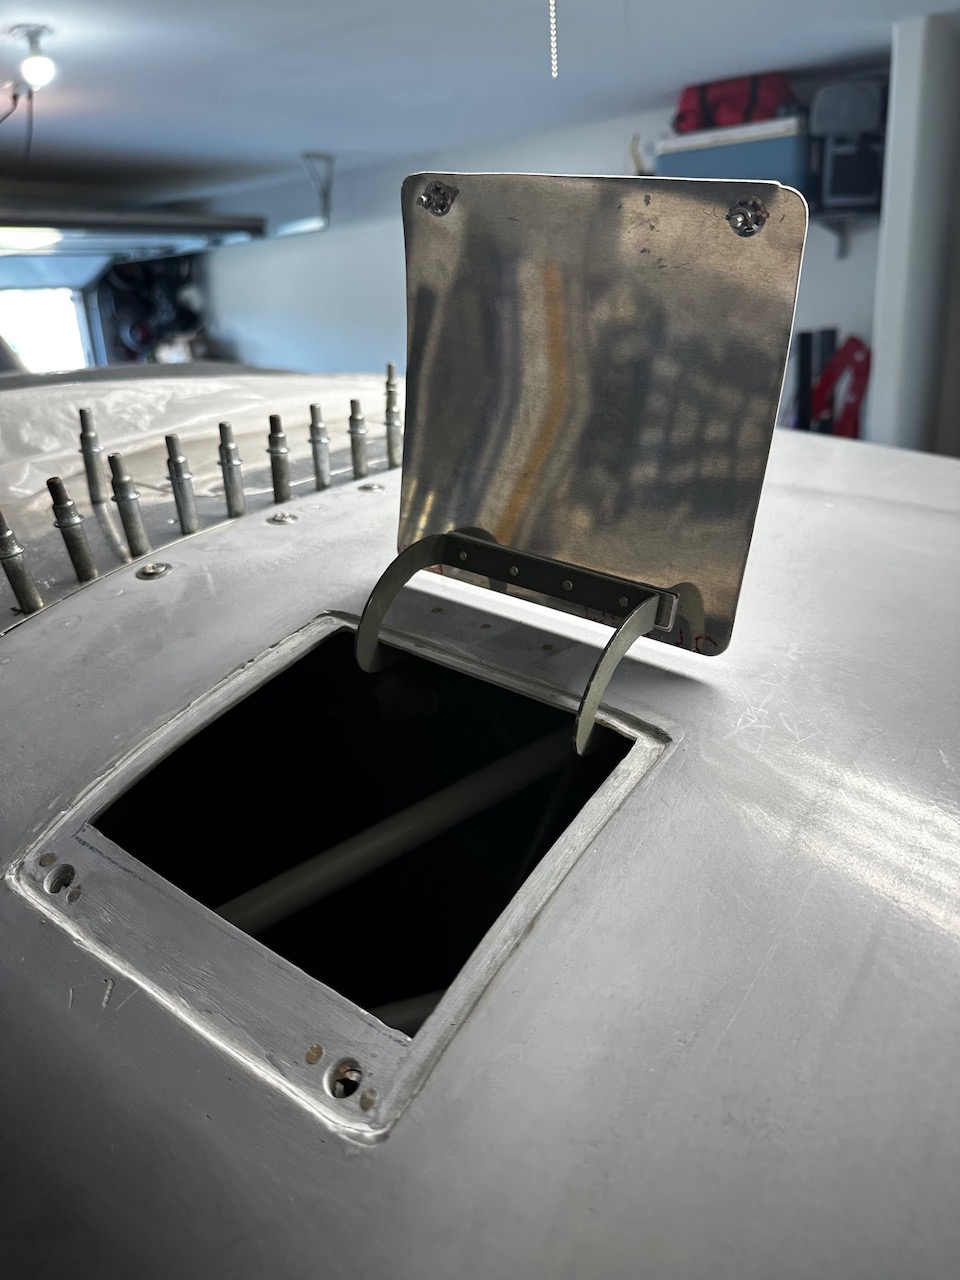
I then installed the oil door in the top of the cowling. I also opted for a different version of Skybolts to hold the door in place when closed.
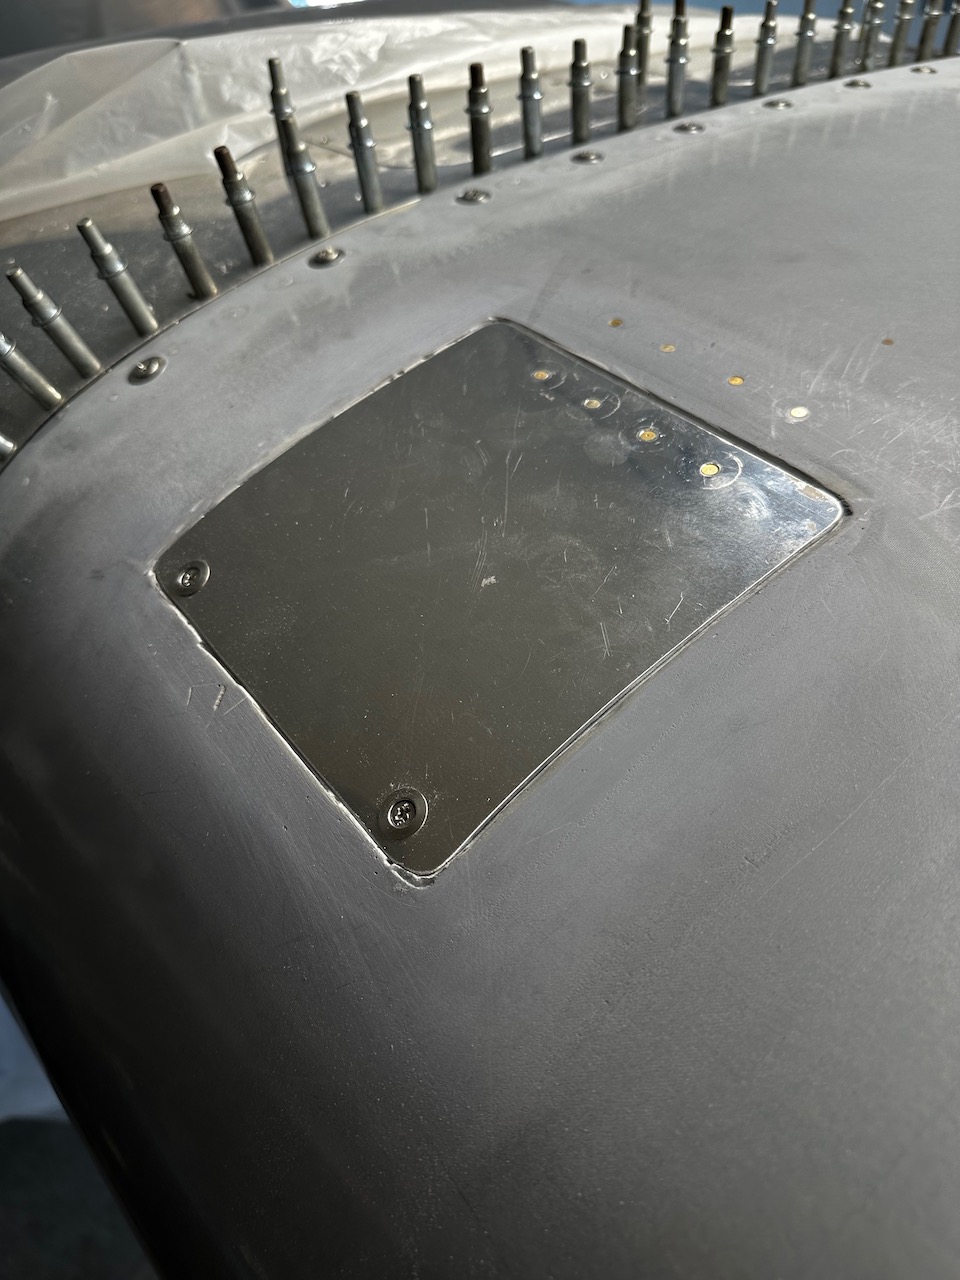
The cowling is now almost complete after nearly 2 months of work. I say nearly complete because I need to clean up corners and improve the fit as the two cowling halves come together by adding epoxy and flow. I also want to make the oil door edges look a little better than seen above. This work will be completed over the coming months.
