
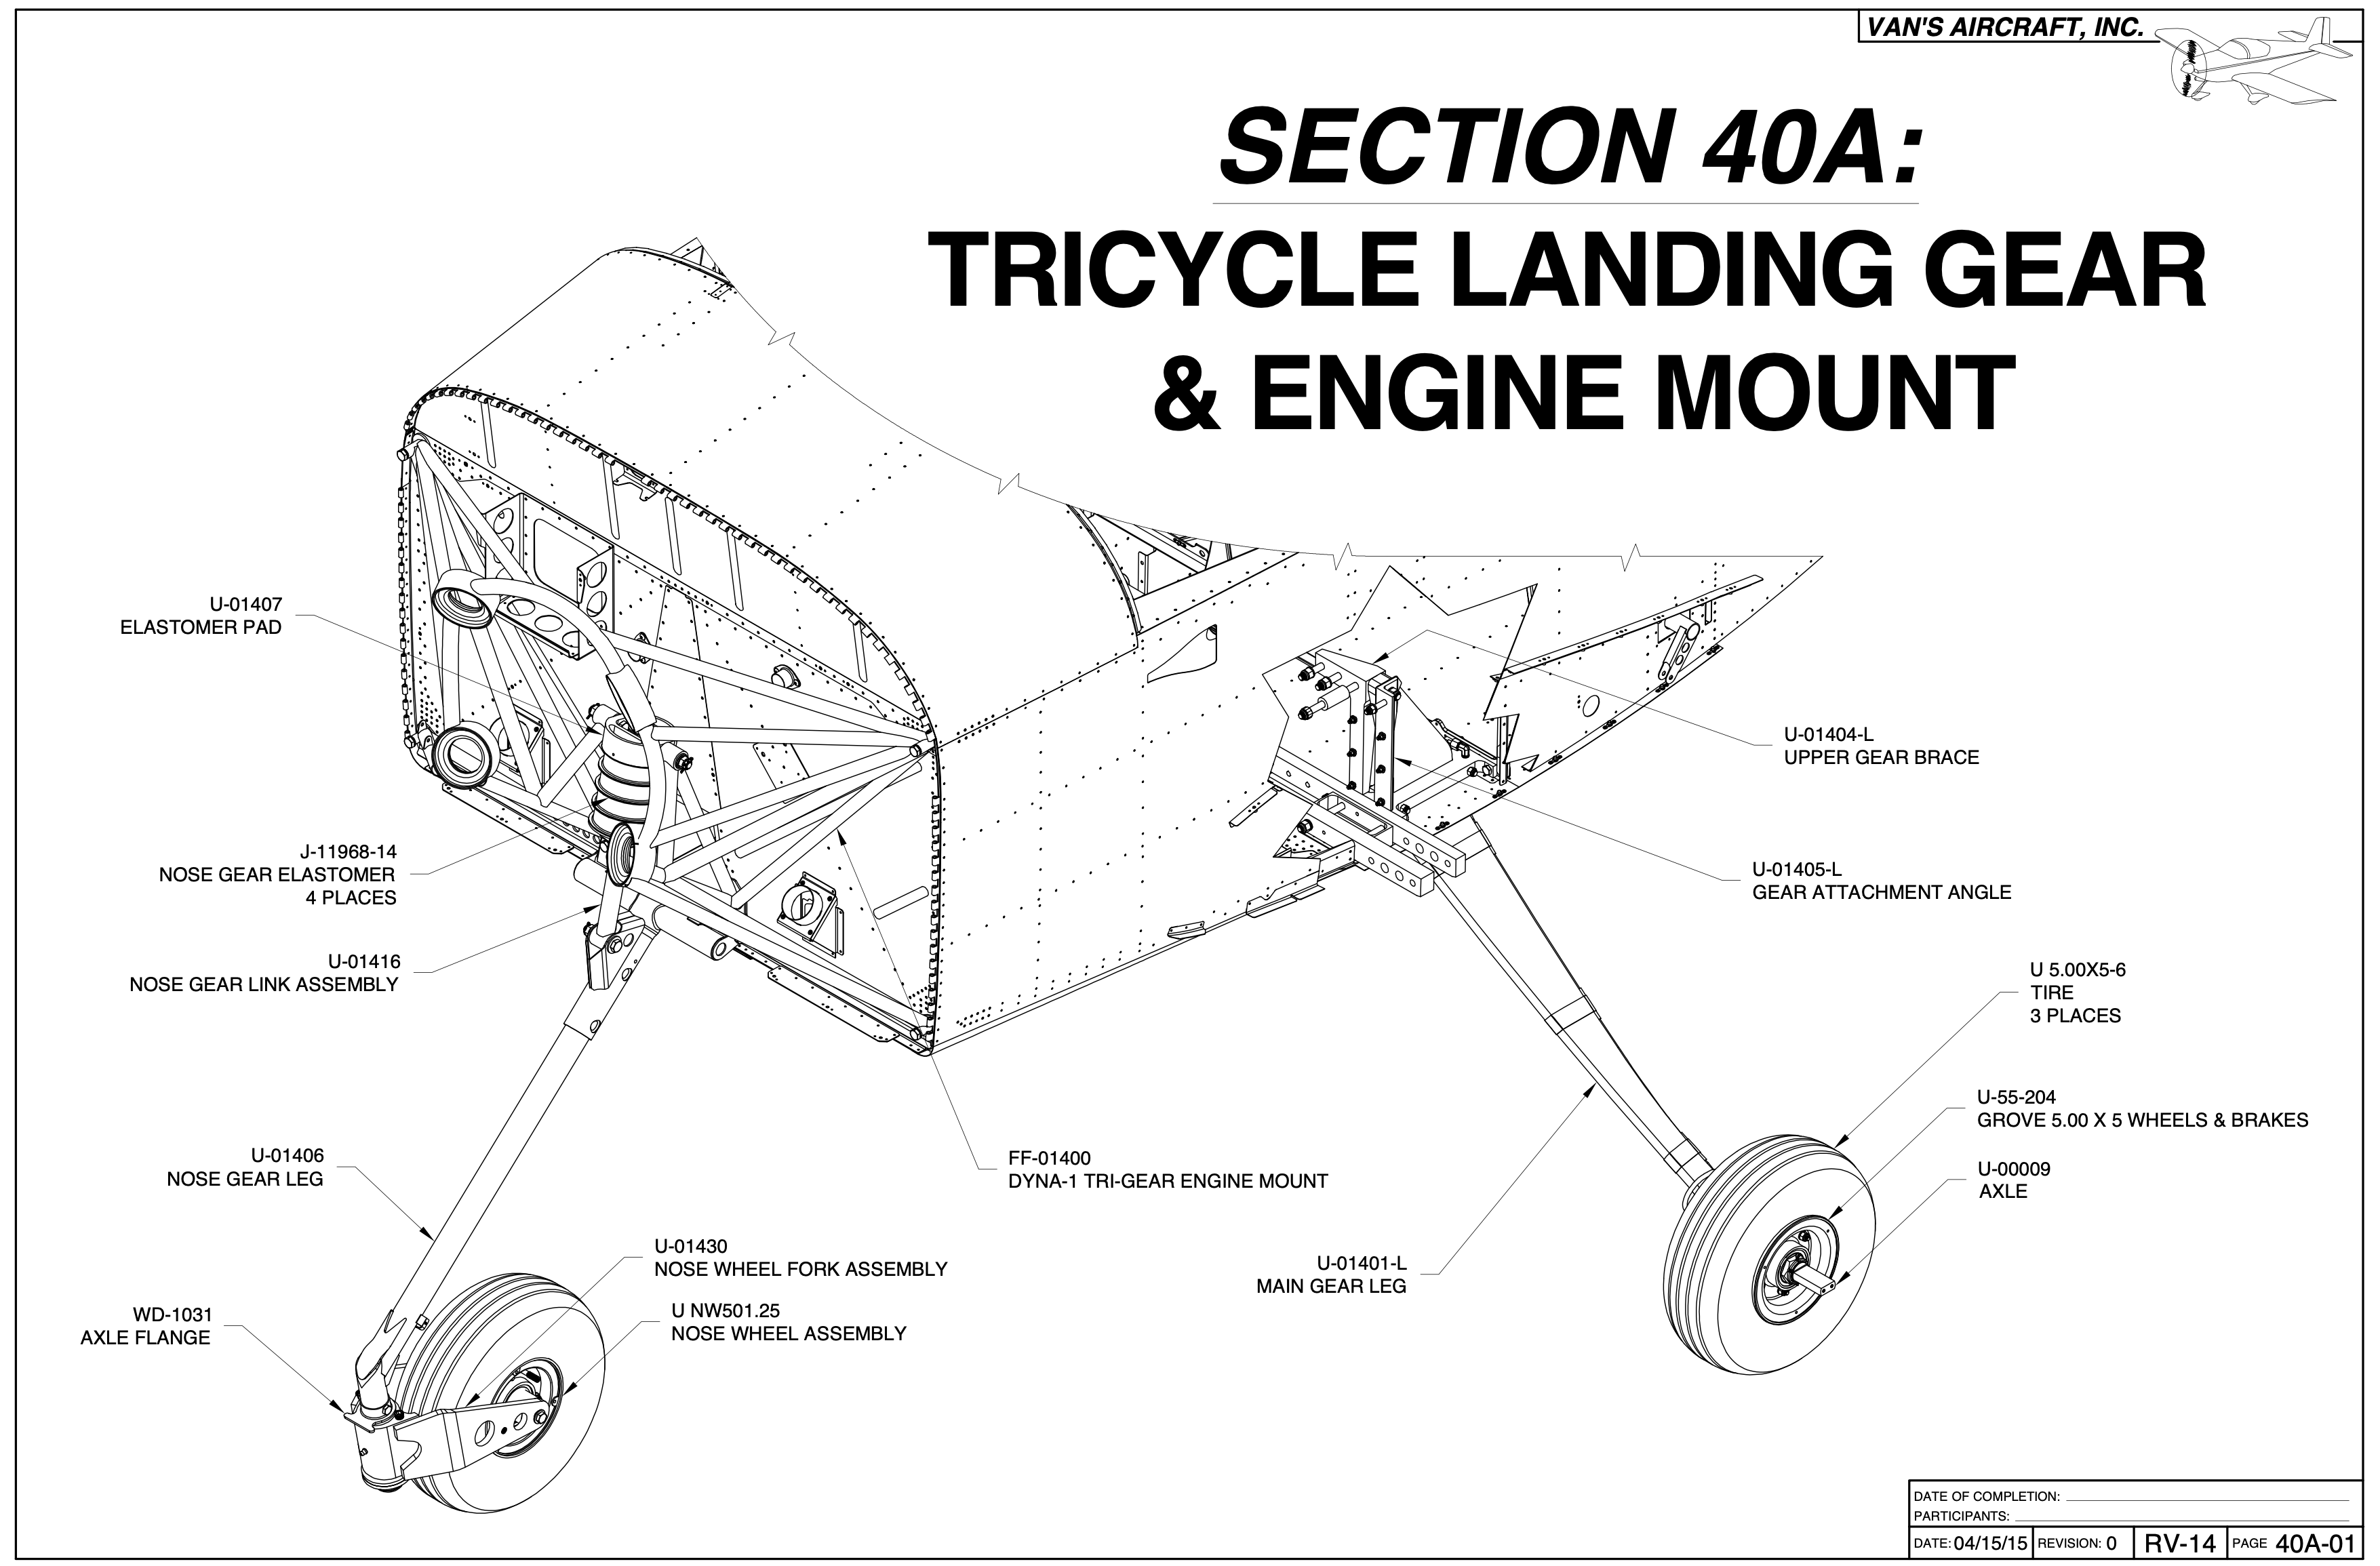
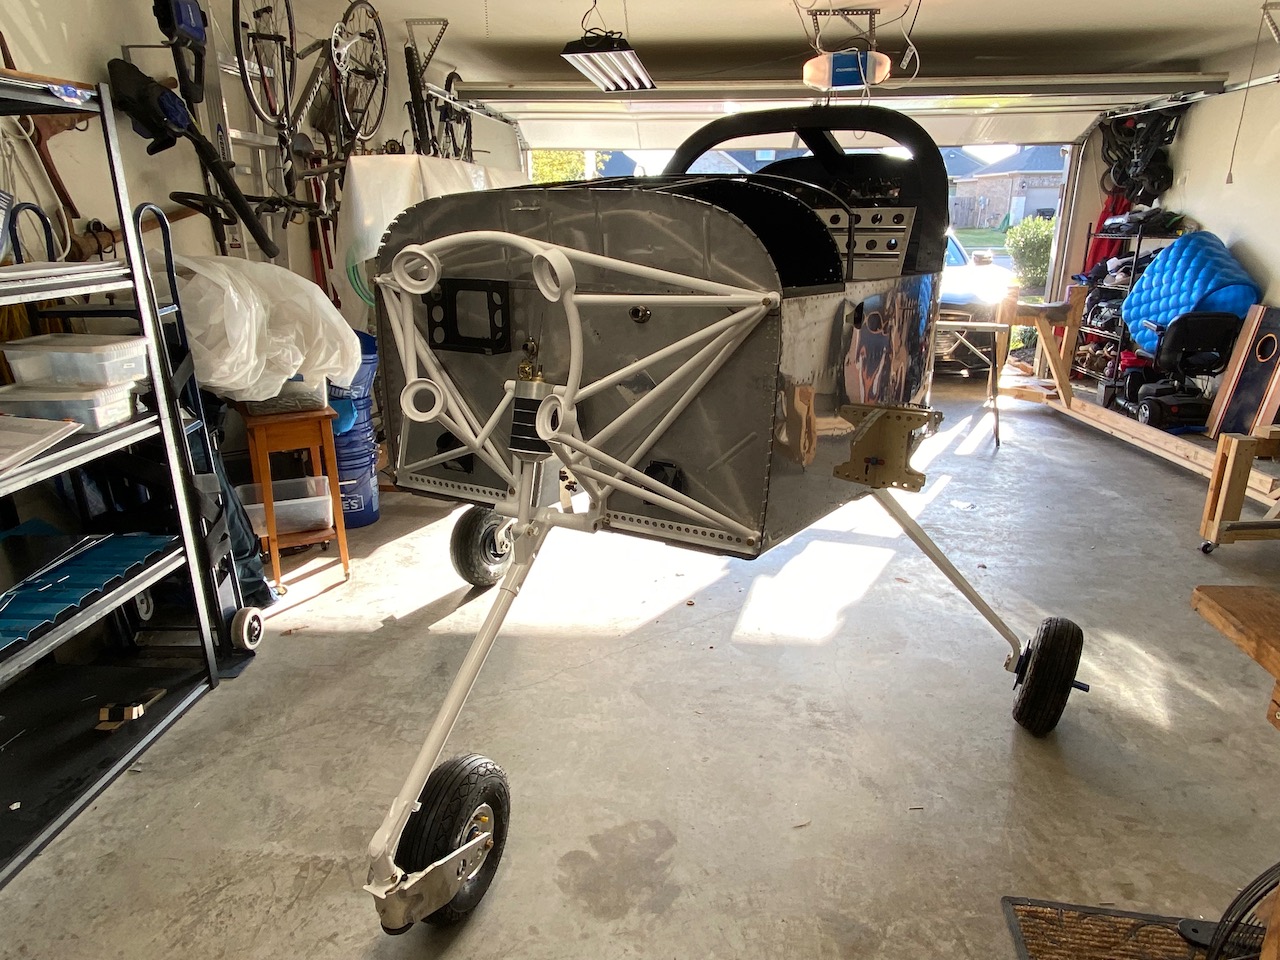
In this section I attached some heavy metal pieces such as the landing gear and engine mount. The total time spent wasn’t all that much compared to other sections but it had some very satisfying moments:
The engine mount was pretty straight forward by attaching it to the front of the fuselage with 4 bolts.
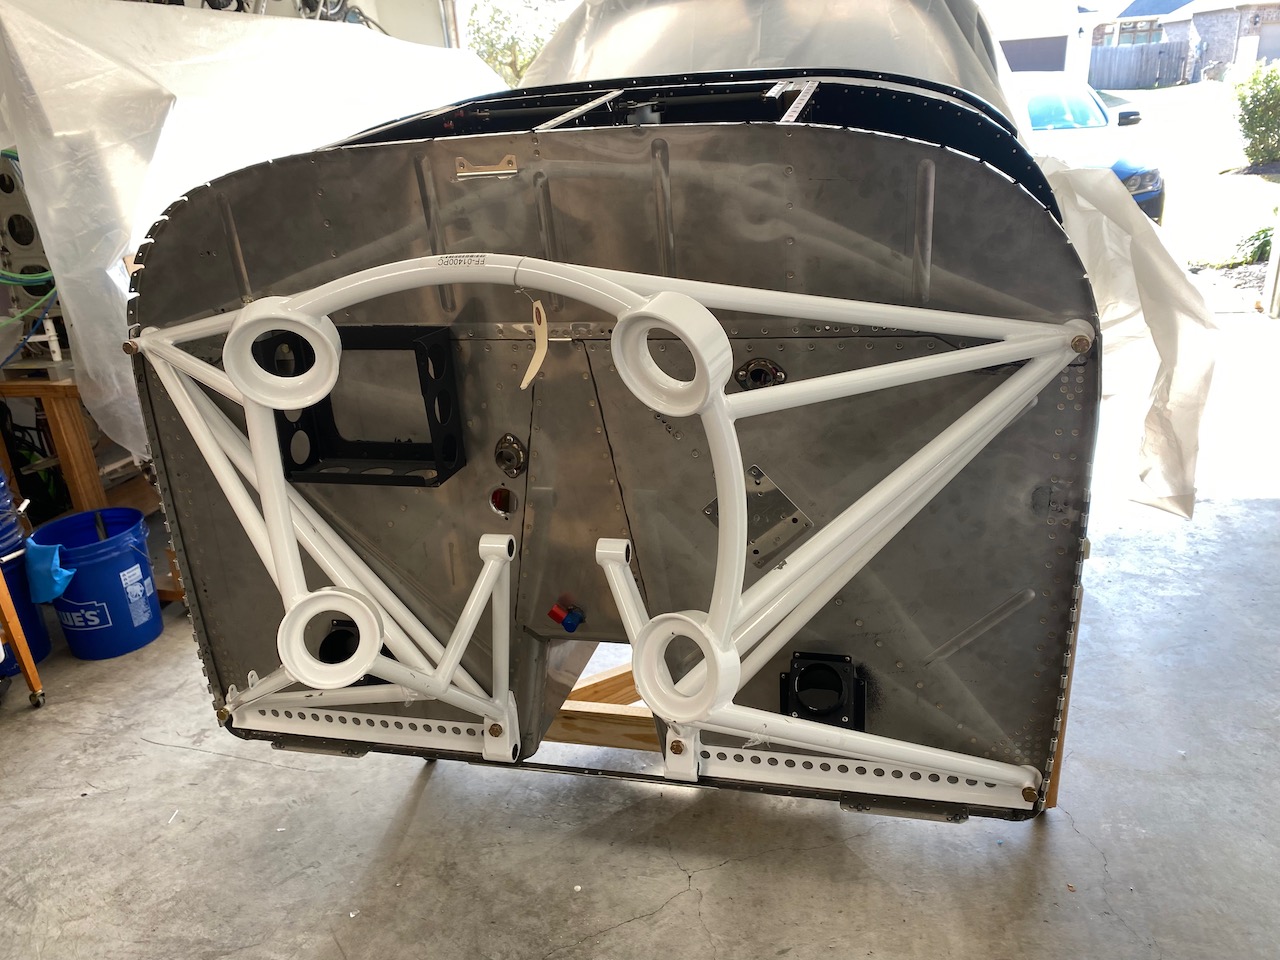
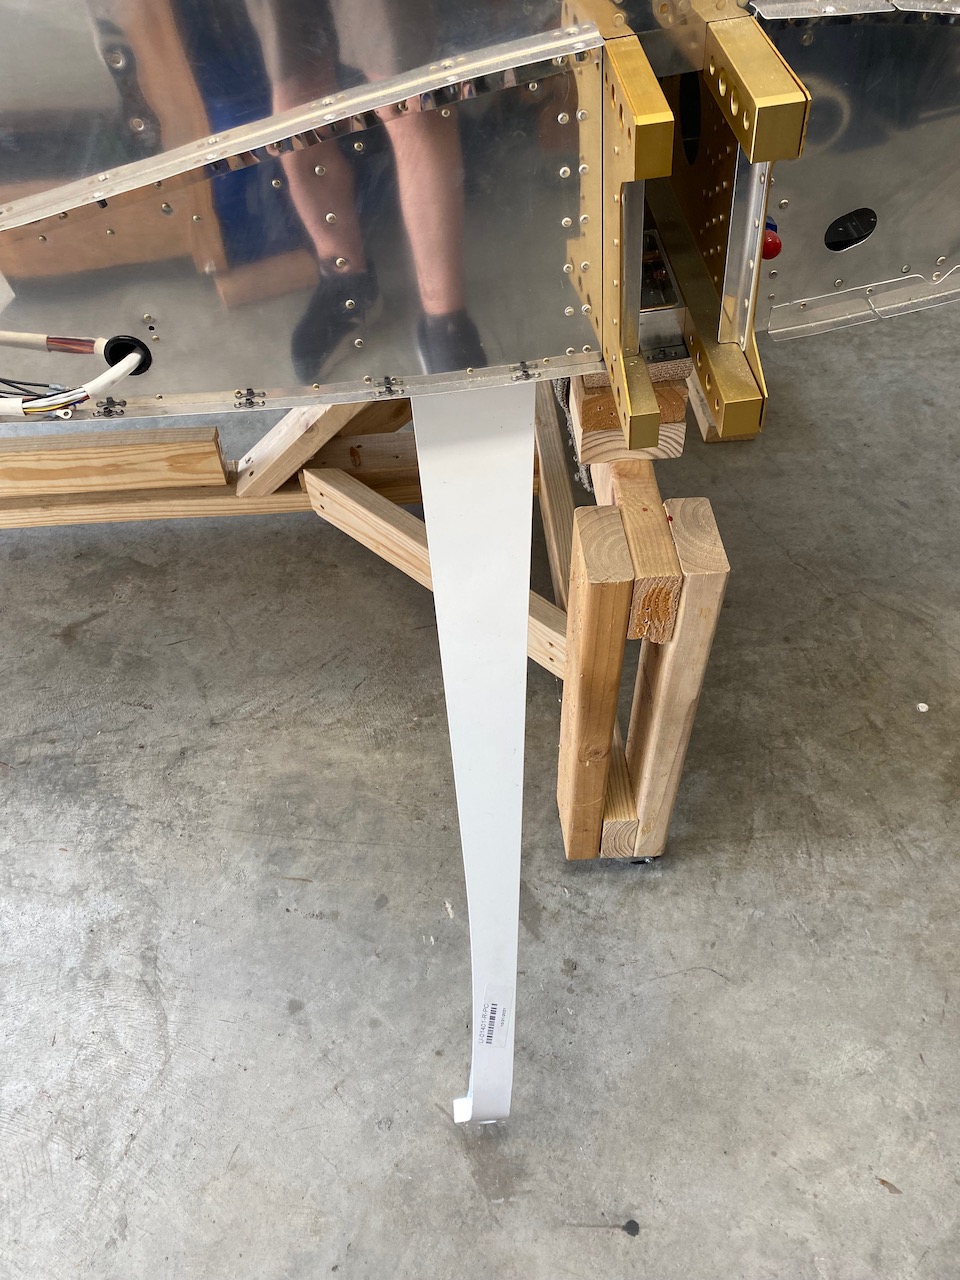
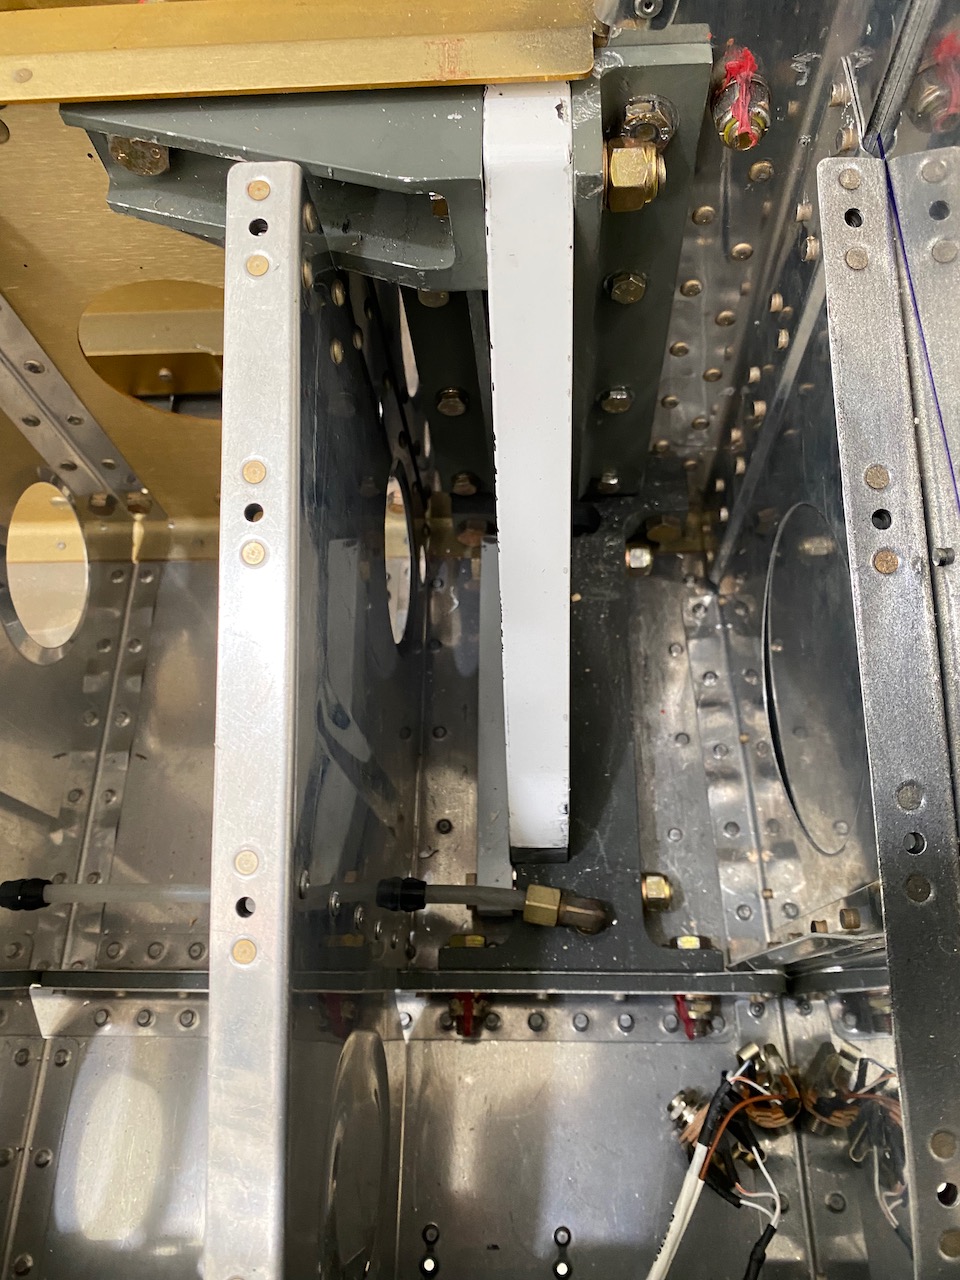
Then the process of inserting the main gear legs through the bottom of the fuselage and securing it between two heavy aluminum blocks previously installed. It was secured to the top with a large bolt.
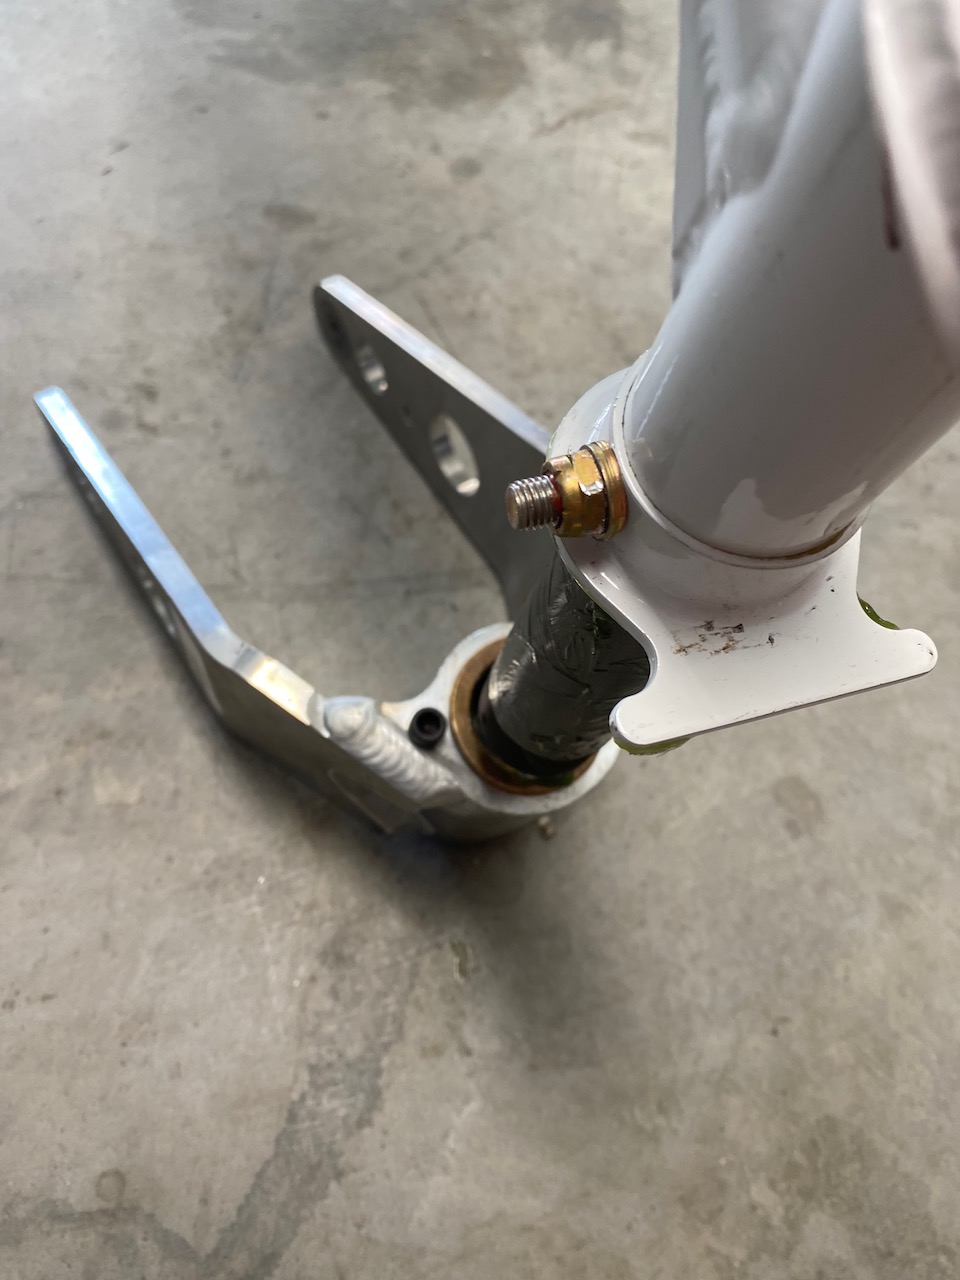
I guess I don’t have a lot of photos of the process but the nose gear is a single large strut attached to an elastomer pancake type thing that acts as a shock absorber. The nose wheel is free castering similar to Grumman Tigers and Cheetahs.

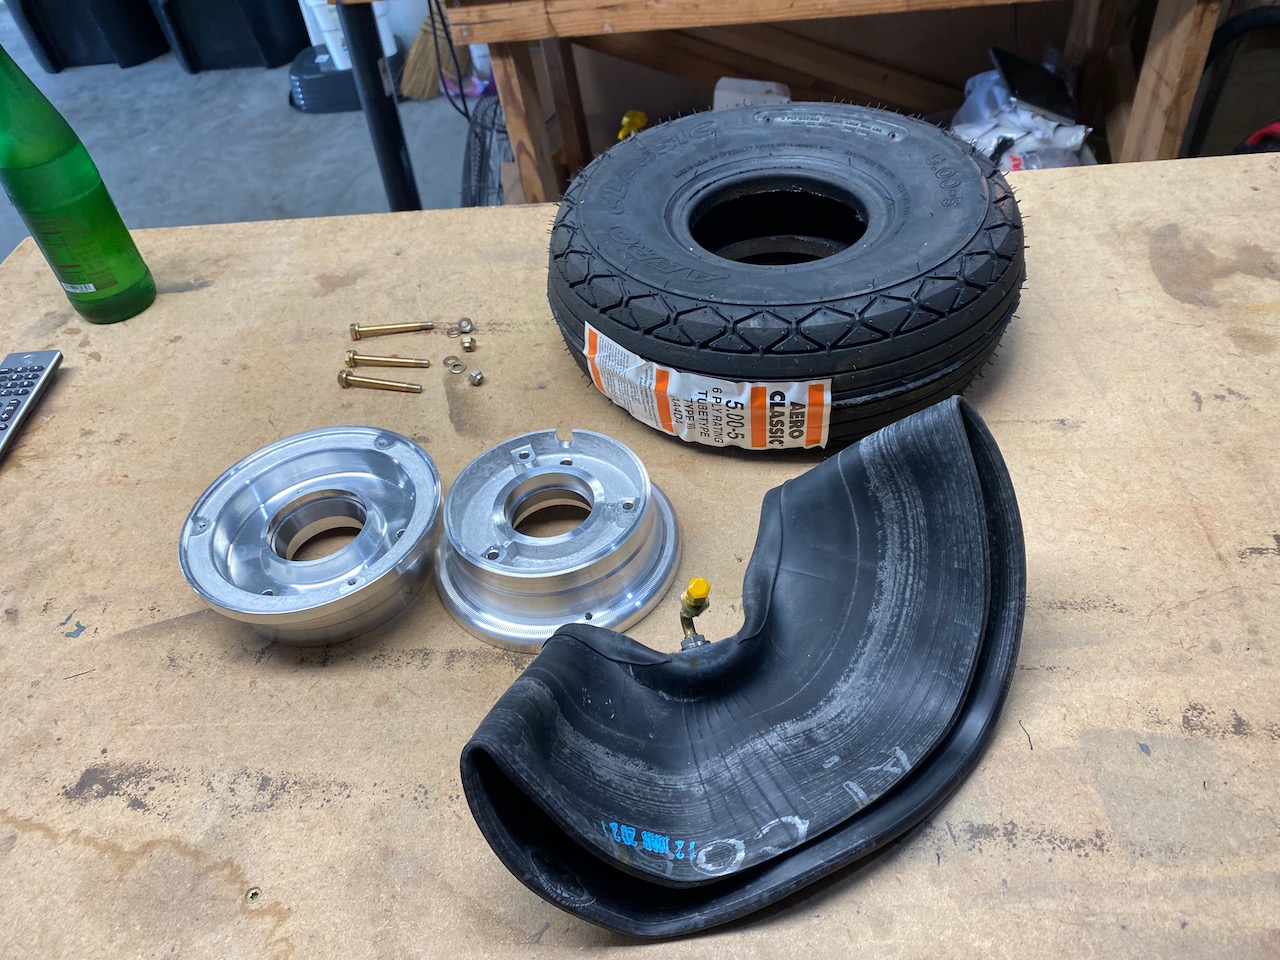
Next, it was on to building the wheels which involved packing bearings with grease, inserting an inner tube, and then bolting the two halves of the wheels together. The wheels were then attached to the nose strut and mains.
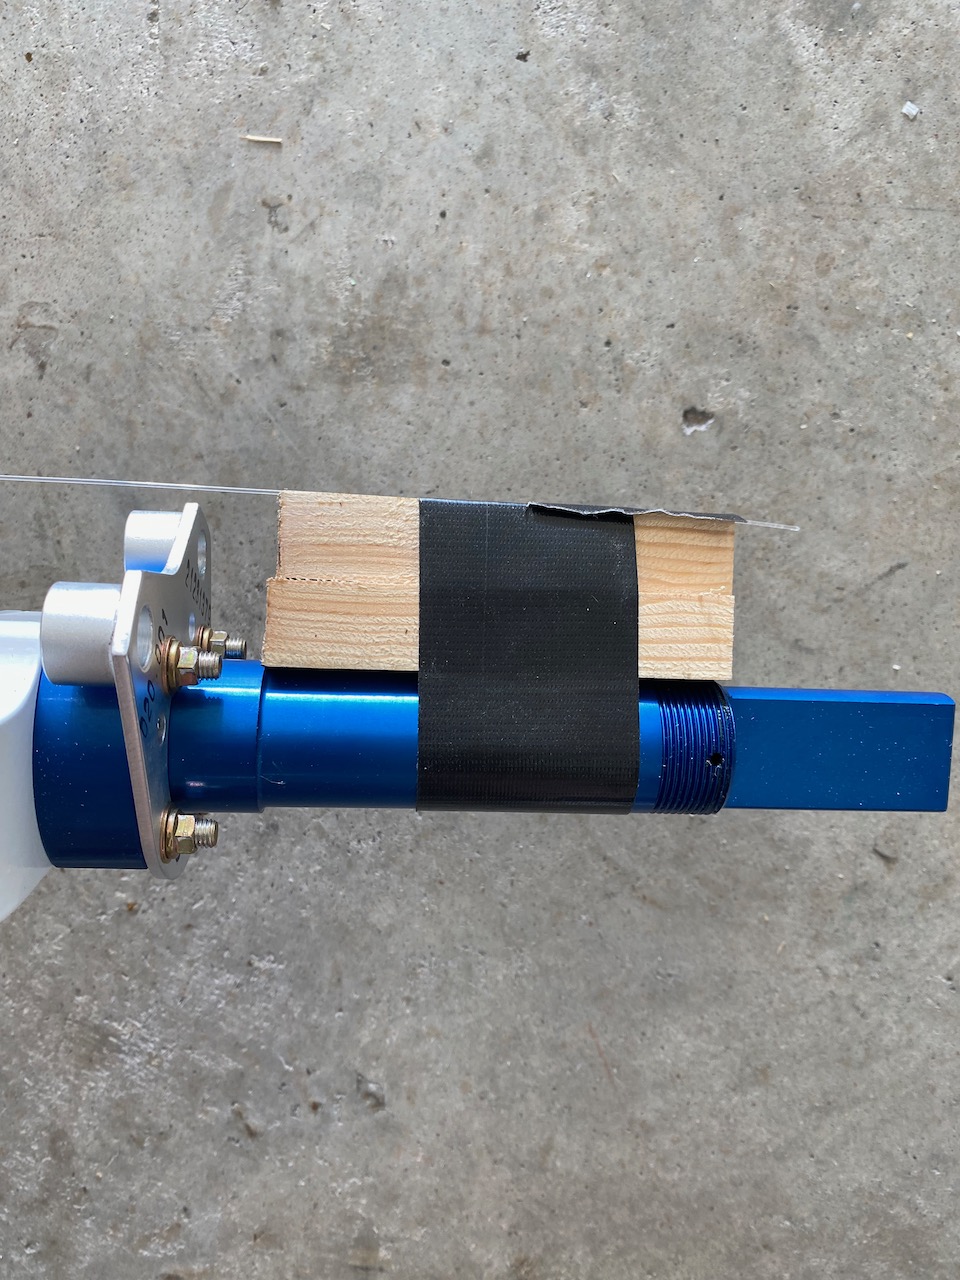
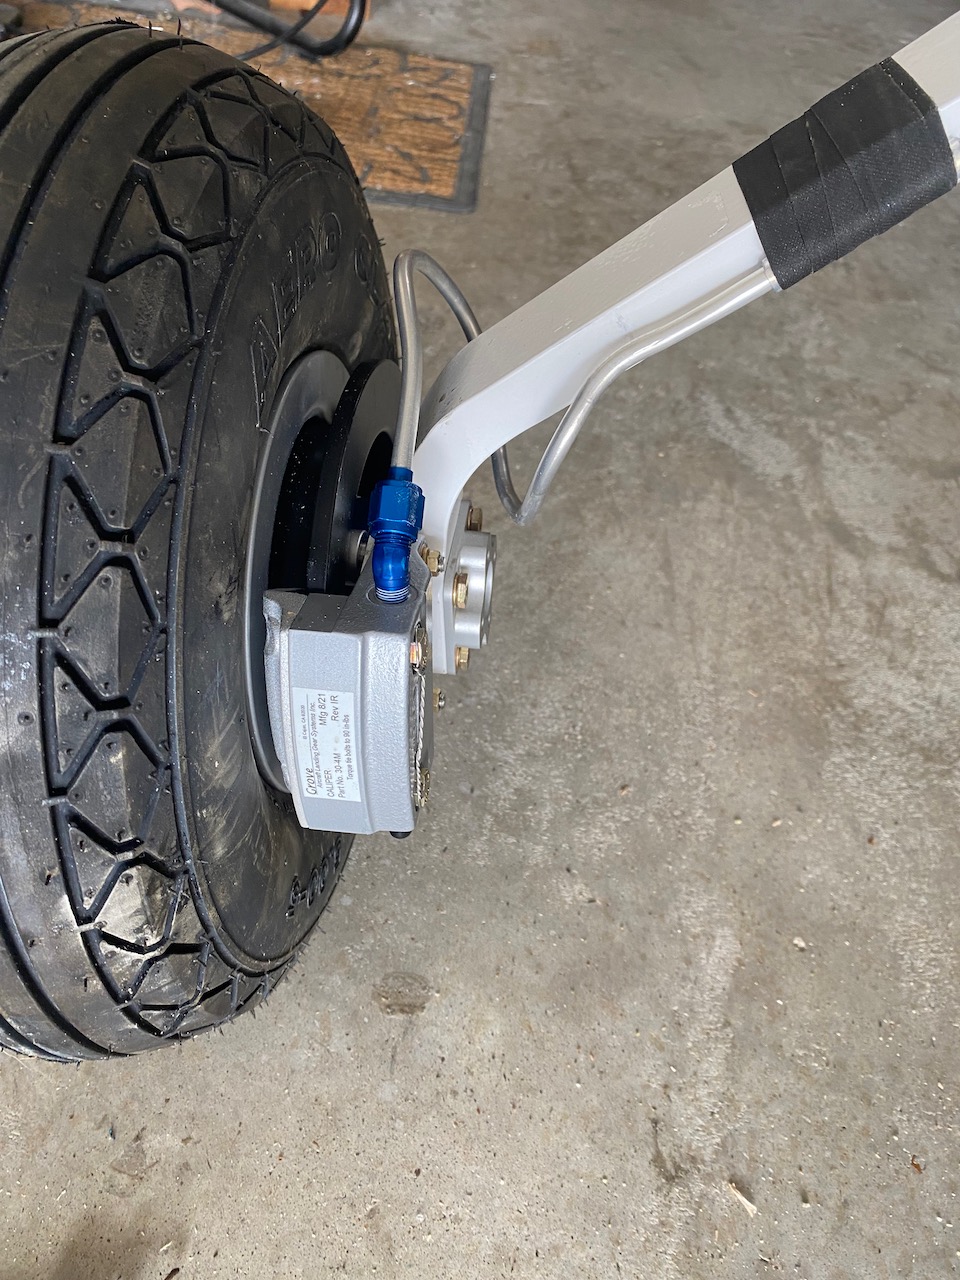
Before attaching the wheels to the main landing gear, the instructions said to ensure proper wheel alignment by attaching a string between the axles (as per below). I had a slight toe out on the right main which required the addition of a 0.5 degree spacer to ensure correct alignment. Alignment was correct when the string laid flat along the blocks taped to the axle
Wheels were added to the main and nose gears, and suddenly, N124KB made its first landing.
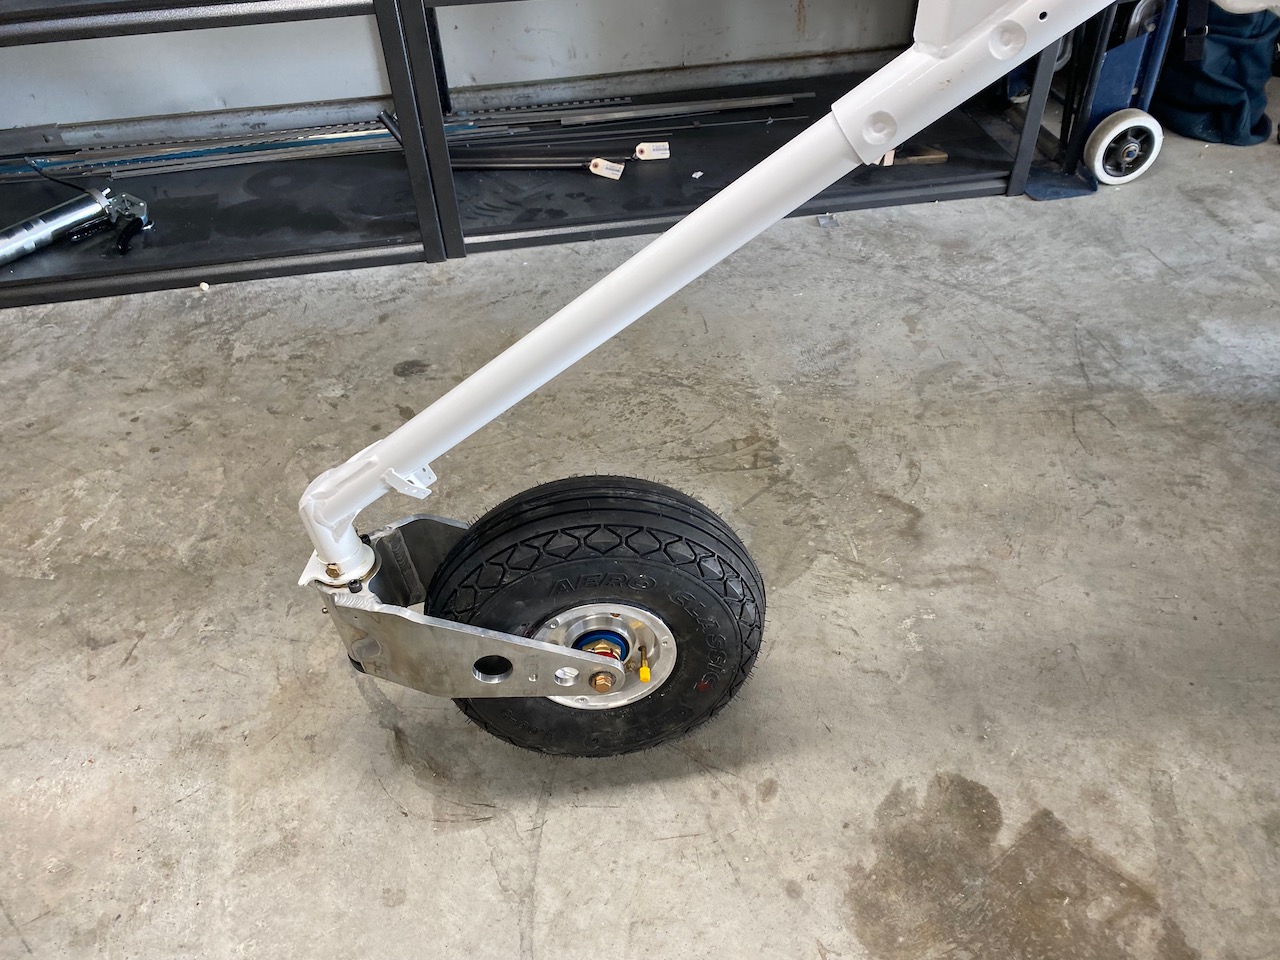
The last step in this section involved attaching the disk brake calipers to the main wheels along with adding the aluminum tubing used as brake lines. The black friction tape holds the line to the gear strut but this will eventually be covered with a fiberglass fairing.

It is interesting to see how much carpentry you have needed to do for fixtures, tables, etc. Sure is taking shape my good man
Hope you are well. Say hi to Kirsten
Randy
Sent from my iPad
>
Where are you going to continue the building of the aircraft once you move down town? HA R
Sent from my iPad
>